# Part 1 - Introduction To OAuth
Table of Contents
OAuth 2.0 DefinitionLink to heading
Here is the official definition of of OAuth 2.0 according to RFC 6749:
“The OAuth 2.0 authorization framework enables a third-party application to obtain limited access to an HTTP service, either on behalf of a resource owner by orchestrating an approval interaction between the resource owner and the HTTP service, or by allowing the third-party application to obtain access on its own behalf.”
One of the main use cases of OAuth 2.0 is to give third party applications limited access to the private resources that you own. We will see how that is exactly done throughout this article. Let’s discuss an example where OAuth can be used.
Let’s say you are tracking your fitness activities through a sport activity tracking application called Strava. You would like Strava to automatically make a post on your behalf to your Facebook account so your friends can see your sports activity.
Throughout this article, we’ll explore several methods for connecting Strava to your Facebook account. We’ll begin with the simplest connection options and progress toward implementing a complete OAuth flow:
First of all, let’s discuss the various components that we will see when learning OAuth 2.0.
OAuth 2.0 ComponentsLink to heading
- Resource Owner: This is a real person who controls access to an API and can grant limited permission to another application. In other words, they decide to share access to certain parts of their API with another app. The resource owner also uses a web browser to approve this access. In our example, the Resource Owner is you 🫵! You own the Facebook account (the API) that Strava wants limited access to, so it can make a Facebook post on your behalf.
- Protected Resource: The component that the Resource Owner (you) has access to. This is normally an API. In our example, the Protected Resource will be your Facebook account.
- Client: The piece of software that accesses the protected resource (your Facebook account) on behalf of the resource owner (you). In our example the Client is Strava.
Let’s map out the OAuth components once again according to our example:
- You are the OAuth
Resource Ownersince you are the owner of your Facebook account. - Your Facebook account is the OAuth
Protected Resource. - Strava is the OAuth
Clientthat is trying to get access to Facebook on your behalf to make a Facebook post of what exercise you did so your friends can see that you’re not lazy!
The end goal is for Strava to be given access to your Facebook account in order to make posts. In other words, you as the user need to delegate authorization to the Client (Strava), so the Client can access the Protected Resource (your Facebook account).

Client AuthorizationLink to heading
Let’s think of the most basic authorization setup in order for Strava to connect to your Facebook account. Strava asks you for the username and password of your Facebook account and connects on your behalf.

Although, there are many problems with this approach, the goal is achieved! Strava can now make posts on your behalf to your Facebook account! There are definitely areas of improvement in this setup. Let’s look at the current challenges we face with this setup:
- Strava has total control of your Facebook account and can do any action.
- Facebook has no way of differentiating between you and Strava since Strava is using the same username and password that you are using to login.
- Strava has stored your username and password on its database for use in the future. So it does not have to notify you every time it will post on Facebook.
Yikes! By solving the connection problem for Strava to post on your Facebook account on your behalf, we seem to have made quite a mess! We can do better!
Here is another solution: what if Strava could create a partnership with Facebook and get access to all Facebook accounts by using a very secret password that is given by Facebook to Strava. This secret password would only allow Strava to make posts for users and nothing else. For example, Strava will not be able to send a Facebook friend a direct message on behalf of any user. Strava will only be allowed to publish Facebook posts on behalf of any user.

As in the previous solution, the end goal is reached. Strava is now connected to your Facebook and can publish posts on your behalf. The benefit of this solution is that Strava will not have a need to ask for your password. Strava would just need to know your username and use it’s all powerful, secret password given by Facebook to make a post on your behalf. Just like it can do for any other user. Although this approach solves some of the problems mentioned in the previous solution, there are still some glaring flaws:
- If Strava gets hacked, then Facebook would be compromised since the hackers are now in control of the very powerful password that can make posts on behalf of any user.
- It’s highly unlikely that Facebook would ever give any app this kind of powerful permission.
- You, as a user do not have much control in this situation. For example, you can’t revoke Strava’s access to your Facebook account. Strava can freely make posts on your behalf whenever it wants.
What if you could give Strava a special Facebook password (other than your
real password) that lets it post on your behalf but nothing else. For
example, Strava wouldn’t be able to see your friends list because this
password only grants the permission needed to publish posts. We’ll call
this special password a token.
 that only allows for publishing posts on the resource owner's account")
This is looking much better than the very first solution of Strava replaying the user credentials to Facebook. Strava now only has access to posting on your behalf. You can revoke access to Strava at any time by changing the password that you provided Strava. Also, Strava does not have universal access to make posts for any user anymore. Although this is a good solution, it is still not optimal. Let’s discuss the challenges we face with this setup:
- What if you as a user have several fitness apps that track your health and post for you on your Facebook account. You would have to manage several tokens (password) for each fitness app. You could provide the same token for each fitness app but that would lead to a security risk. Meaning, if one fitness app token is compromised, all other fitness apps would be at risk.
- There is no way for you to revoke access to Strava other than changing your password. So there is no correlation between the Strava (client) and the token.
What if we were able to have this token issued separately for each client and user combination to be used at a protected resource, such as your Facebook account? What if there was a network protocol that allowed for the generation and secure distribution of these tokens? Now we are getting somewhere!
Delegating AccessLink to heading
The network protocol in question is called OAuth 2.0! Once again, the end goal is for you, the user to delegate your authority of your Facebook account to Strava, so it can publish posts on your behalf. OAuth introduces another component into the solution called the Authorization Server.

The Authorization Server establishes trust between itself and the protected resource (your Facebook account). The green line is the goal! To establish a connection between Strava and your Facebook account. In other words, the goal is to establish a connection between the client and the protected resource by delegating the user’s access to the client.
For you (the OAuth user) to delegate the authorization of your Facebook account to Strava, the following steps will occur:
- You access Strava (the OAuth client).
- Strava redirects you to the Authorization Server.
- You authenticate yourself to the Authorization Server.
- You will be given a choice if you would like to delegate your authorization to Strava. The Authorization Server will tell you exactly what Strava will be able to do on your Facebook account. You consent to delegate authorization of your Facebook account to Strava.
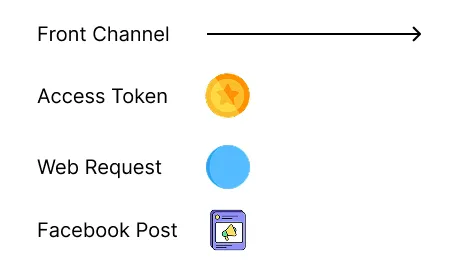
- The authorization server will send a special token to Strava called an OAuth Access Token which will allow Strava to connect to your Facebook account and publish posts!
- You have successfully delegated your authorization of your Facebook account. Strava is now able to make a Facebook post on your behalf.
Enhancing SecurityLink to heading
There is a potential security risk with the flow mentioned above. The entire authorization flow is happening on the front channel, from the browser, which can be listened to by an attacker. In that case, an attacker can intercept the flow and grab the OAuth Access Token for malicious activities.
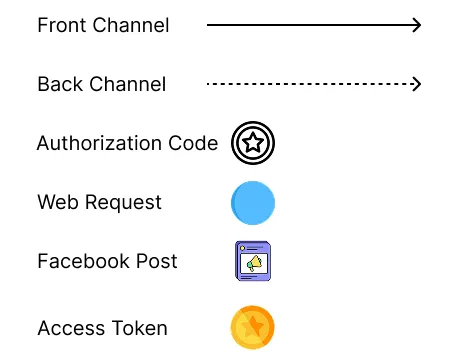
To guard the authorization flow from attackers, OAuth 2.0 has introduced
another token called the OAuth Authorization Code. The client receives
this code via the front channel (browser redirect) and exchanges it
securely for an access token via the back channel (direct server-to-server
request). The Access Token is communicated through the back channel. If an
attacker was intercepting the user’s browser, the attacker would only be
able to access the front channel requests, not back channel, so the
attacker would not get the Access Token.
- The Authorization Code is returned to the client after the user successfully authenticates and approves the request from the client.
- The Access Token is what the API will validate and use to decide whether to grant access to specific operations.
The Authorization Server sends the Authorization Code to the Client after the user grants approval. The Client then uses this Authorization Code in a secure back-channel request to authenticate itself to the Authorization Server and exchange the Authorization Code for an Access Token.
Once the client has the Access Token, the client can freely make Facebook posts for the specified user.
That is the entire OAuth 2.0 flow at a high level! Well done! 🚀