# Part 2 - The OAuth Client
Table of Contents
IntroductionLink to heading
In part 1 of this series, we walked through the Authorization Code grant type. We will continue using the example of Strava connecting to your Facebook account on your behalf in order to make a post.
In this blog post, we will dive deeper into the OAuth Client component and discuss various concepts around it. Once we have covered the foundations, we will discuss why it is important for the client to use the state parameter. Here is an animation of a simulated CSRF attack on an OAuth client that does not take advantage of the state parameter:
Let’s start discussing various concepts that are used in relation to the OAuth Client.
URL RedirectLink to heading
Here is the definition of a URL redirection:
“URL redirection, also known as URL forwarding, is a technique to give more than one URL address to a page, a form, a whole website, or a web application. HTTP has a special kind of response, called an HTTP redirect, for this operation.”
In the previous blog post, we saw that the user is redirected to the Authorization Server when initially accessing the client. This is possible because the client provided more than one URL. On top of providing the client’s own URL, the client also provides the URL of the authorization server to forward the user to delegate authorization. So when the user initially clicks on the link of the client, the user gets sent (redirected) to the Authorization Server.
To summarize, the OAuth Client does not want to directly communicate with the Authorization Server, since the user must consent directly with the Authorization Server to delegate the user’s permissions to the client. This is why the client redirects the user to the Authorization Server. The client treats the user’s browser as a middle-man between itself and the Authorization Server.
If the client were to directly communicate with the authorization server to grab the Access Token when the user initially sends a request to the client, then this would lead to several problems:
- As mentioned, the user must consent directly to the Authorization Server.
- User authentication would happen on the client, and the client would need to replay the user credentials on the Authorization Server.
For these reasons, it is important for the URL redirect to exist in OAuth 2.0.
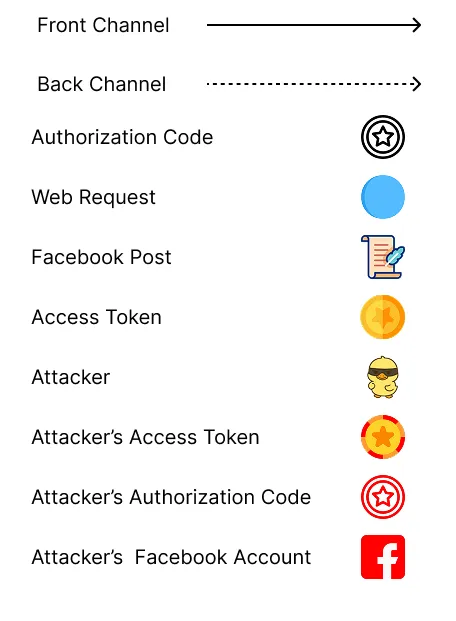
Back Channel vs. Front ChannelLink to heading
Back Channel and Front Channel communication is not particular to OAuth. It is more of a networking concept.
Front Channel communication is when network communication is done through the browser. For example in the previous blog post, the user accesses the client and gets sent (redirected) to the Authorization Server, through their browser. If there is a URL Redirect, then it will always happen on the front channel!
Back Channel communication is when a direct request is sent to a server without any middle-man. This becomes highly secure especially when HTTPS is used. An example of this is when the client directly calls the Authorization Server to request an Access Token by providing a valid Authorization Code. The client made a request directly to the Authorization Server, and did not go through the user’s browser.
OAuth Flow - Client PerspectiveLink to heading
Client InitializationLink to heading
The first step in the OAuth flow is for the client to get the registered client ID and client secret from the authorization server.
Once the client has the client ID and the client secret, the client needs to know how to talk to the Authorization Server. The client requires two endpoints:
- The authorization endpoint to get the Authorization Code. In this
example, we will use the following endpoint to grab the Authorization
Code:
https://auth-server/authorize. - The token endpoint to get an Access Token by providing a valid
Authorization Code. In this example, we will use the following endpoint
to grab the Access Token:
https://auth-server/token.
The client doesn’t need to know anything about the Authorization Server beyond that.
URL Redirect For UserLink to heading
Once the user accesses the client, the user is redirected to the
Authorization Server using the authorization endpoint /authorize to
initiate the authorization process. The client adds the following
parameters in the URL:
response_type: codeclient_id: stravaredirect_uri: https://strava.com/callbackThis would form an HTTP redirect like the following:
HTTP/1.1 302 FoundLocation: https://auth-server/authorize?response_type=code&scope=post&client_id=strava&redirect_uri=https%3A%2F%2Fstrava.com%2FcallbackVary: AcceptContent-Type: text/html; charset=utf-8Content-Length: 444Connection: keep-aliveAnd from the redirect, the client would send an HTTP request like the following to the Authorization Server:
GET /authorize?response_type=code&scope=post&client_id=strava&redirect_uri=https%3A%2F%2Fstrava.com%2Fcallback HTTP/1.1Host: auth-serverAccept: text/html,application/xhtml+xml,application/xml;q=0.9,*/*;q=0.8Client Requests Access TokenLink to heading
When the user is redirected back to the client from the Authorization Server, the client receives an Authorization Code from the response. The Authorization Code represents the result of the user’s authorization decision. Here is what the callback to the client from the Authorization Server looks like:
GET /callback?code=8V1pr0rJHost: strava.comThe client can parse the request and grab the Authorization Code. The
client is now ready for the next step, which is requesting for the Access
Token. This is done by the client providing the following information in
the POST request to the /token endpoint on the Authorization Server:
- Client ID
- Client secret
- Authorization Code
This request is done directly between the client and the Authorization Server. This request occurs on the Back Channel. Here is what the request would look like:
POST /token HTTP/1.1Host: auth-serverAccept: application/jsonContent-type: application/x-www-form-urlencodedAuthorization: Basic b2F1dGgtY2xpZW50LTE6b2F1dGgtY2xpZW50LXNlY3JldC0xgrant_type=authorization_code&redirect_uri=https%3A%2F%2Fstrava.com%2Fcallback&code=8V1pr0rJIf the request is successful, then the client would get an Access Token back from the Authorization Server. Here is what the response would look like from the Authorization Server to the client:
HTTP/1.1 200 OKDate: Fri, 31 Jul 2026 21:19:03 GMTContent-type: application/json{"access_token": "987tghjkiu6trfghjuytrghj","token_type": "Bearer","expires_in": 3600}If the request is successful, then the client would get an Access Token back from the Authorization Server. Here is what the response would look like from the Authorization Server to the client:
HTTP 200 OKDate: Fri, 31 Jul 2026 21:19:03 GMTContent-type: application/json{“access_token”: “987tghjkiu6trfghjuytrghj”,“token_type”: “Bearer”}Client Accesses The Protected ResourceLink to heading
There are several methods for the client to present the Access Token to the
protected resource. In most cases the client presents a bearer token.
Here is what the call looks like:
GET /resourceHost: facebook.comAccept: application/jsonConnection: keep-aliveAuthorization: Bearer 987tghjkiu6trfghjuytrghjThe state parameterLink to heading
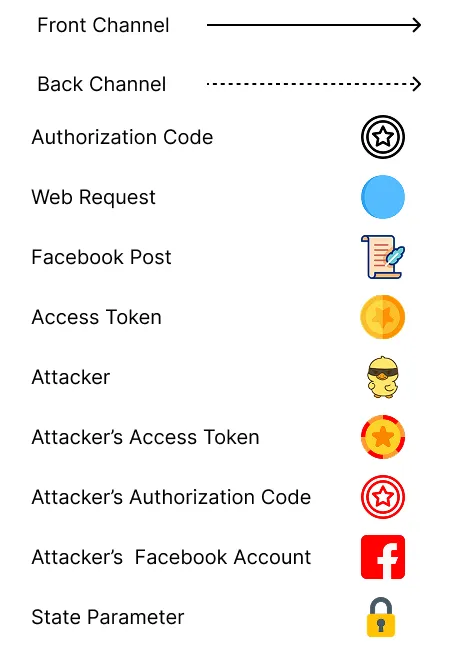
The state parameter is generated by the client for every authorization flow. It is stored in the client’s local storage. The client then includes this state parameter as a query to the Authorization Server in the initial redirect of the user when requesting an Authorization Code.
When the user is redirected back to the client with the Authorization Code, the state parameter is also included in the response. The state parameter is compared with what is already stored in the server-side session when it initially made the request. If the client sees a mismatch, then the client rejects the Authorization Code and ends the flow. Each state parameter needs to be unique to every authorization flow.
Simulating A CSRF AttackLink to heading
Let’s walk through a flow of how a CSRF attack can occur when no state parameter is used.
- The Attacker calls the Client.
- The Client redirects the attacker to the Authorization Server.
- The Attacker authenticates with the Authorization Server.
- The Attacker approves the Client.
- The Authorization Server redirects the Attacker with the Authorization Code. The Attacker stops the redirect from happening and grabs the Authorization Code.
- The Attacker sends the user a phishing email containing a crafted link
to the client’s callback URL with the Attacker’s Authorization Code
embedded as a query parameter (e.g.,
https://strava.com/callback?code=ATTACKER_CODE). - The User clicks the link. The User’s browser makes a GET request to the client’s callback URL with the Attacker’s Authorization Code, causing the client to process it as if the user had just completed their own authorization.
- The client requests an Access Token from the Authorization Server by using the attacker’s Authorization Code.
- The Authorization Server sends the client an Access Token paired to the Attacker’s account
- The Client makes a post to the attacker’s Facebook account with the Access Token.
Simulating A CSRF Attack With State ParameterLink to heading
Now let’s walk through the same CSRF attack, but in this case, a state parameter is used!
- The Attacker calls the Client.
- The Client redirects the attacker to the Authorization Server with the state parameter.
- The Attacker authenticates with the Authorization Server.
- The Attacker approves the Client.
- The Authorization Server redirects the Attacker with the Authorization Code and the state parameter. The Attacker stops the redirect from happening, then grabs the Authorization Code and the state parameter.
- The Attacker sends the user a phishing email containing a crafted link to the client’s callback URL with the Attacker’s Authorization Code and state parameter embedded as query parameters.
- The User clicks the link. The User’s browser makes a GET request to the client’s callback URL with the Attacker’s Authorization Code and state parameter.
- The Client looks up the state parameter in the User’s server-side session, but finds no matching state value — because the state was stored in the Attacker’s session, not the User’s. Since there is no match, the Client rejects the request and stops the flow.
Client TypesLink to heading
There are two client types in OAuth 2.0. Confidential clients, and public clients.
A confidential client (sometimes called a private client) is one that can securely store credentials. An example of a private client can be a web application with a backend. The client secret can be stored in the backend of the web application and will not be viewable to the public. This is because the client secret is not exposed to the frontend. For this reason the private client can securely authenticate with the authorization server using its own client secret. In the above example, Strava is seen as a private client, since Strava has its own backend and can store its client secret securely.
A public client is unable to store a client secret. An example of a public client would be a single page application with no backend. If the single page application were to store a client secret, then the client secret would be exposed to the public making it a security risk.
Refresh TokenLink to heading
In that case, the OAuth flow, would start again and the user would be sent to the Authorization Server again in order to delegate the user’s permissions to the client. This can get very cumbersome. Especially when the lifetime of the Access Token is short. The user might have to grant the client permissions multiple times a day. To combat this the OAuth protocol has a new token called the Refresh Token.
If Refresh Tokens are enabled on an Authorization Server, then the client
would receive a Refresh Token alongside the Access Token. The Refresh Token
generally has a longer lifespan than the Access Token. Once the client
receives a Refresh Token from the Authorization Server, it is then possible
to request another access token by sending the Refresh Token, and changing
the grant_type to refresh_token, like so:
POST /token HTTP/1.1Host: auth-serverContent-type: application/x-www-form-urlencodedAuthorization: Basic b2F1dGgtY2xpZW50LTE6b2F1dGgtY2xpZW50LXNlY3JldC0x
grant_type=refresh_token&refresh_token=987tghjkiu6trfghjuytrghj
The authorization server might send back a refresh_token with the
access_token. This means the client just has to use the new refresh token
sent by the Authorization Server. In some cases the Refresh Token might not
even have changed in the response of the Authorization Server. This means
that the previous token is still good to use. Here is what the response
from the Authorization Server would look like:
# RESPONSE FROM AUTHORIZATION SERVER{
"access_token": "IqTnLQKcSY62klAuNTVevPdyEnbY82PB","token_type": "Bearer","refresh_token": "j2r3oj32r23rmasd98uhjrk2o3i"}The Refresh Token must never be sent to the Protected Resource. This reduces the attack surface of the Refresh Token since it has a longer lifespan than the Access Token, so it should remain in the back channel. Meaning, direct calls to and from the Client and the Authorization Server.
The client cannot know if the Access Token has expired. The Authorization Server can give a hint by providing an expiration date, but other than that, the only way to know would be to use the Access Token on the Protected Resource. A well-behaved client would throw out the Access Token before the expiry. When the client requests an Access Token a second time from the Authorization Server, using the Refresh Token, the user is not prompted; instead, an Access Token is provided without forcing the user through the consent screen again. This is because the original authorization grant is still valid — the user already consented, and the Authorization Server uses the Refresh Token to issue a new Access Token silently.
You should now have a clear understanding of the OAuth client and understand how the client can be protected from CSRF attacks. The next post will go through the OAuth protected resource.